How to connect Eleventy and Storyblok
Reading time: 13 minsThis is the second post in a series of articles called "Eleventy and Storyblok" to learn how to use this combination to create a web project.
Before getting into the matter, I really recommend you to read my first article of this series if you haven't yet. Take a moment to check it out and discover why Evleventy and Storyblok is my perfect combination and why you should start using it to take advantage of these two technologies. You can read it here.
So, in this second article I explain you how to connect Eleventy and Storyblok to start consuming content generated in this amazing Headless CMS.
Technical requirements #
This article will show you step by step how to query data from Storyblok to use it in an Eleventy project. You'll need a computer with the following features:
- Node.js. Eleventy requires Node.js 14. I've used v20.10.0 in the examples provided.
- You can check if you have Node installed by running
node --versionin a terminal window. - If the command is not found or returns a number less than 14, you will need to download and install Node.js before proceeding to the next step.
- You can check if you have Node installed by running
- A code editor. I use VSCode, but feel free to use your favorite.
- A Storyblok account. You can create yours here.
- Basic knowledge of HTML, CSS, JavaScript, Markdown, and the command line is helpful.
Once you have all the technical requirements in place, it's time to create the project.
Creating a project in Storyblok #
First of all, let's create a basic Storyblok space for this project!
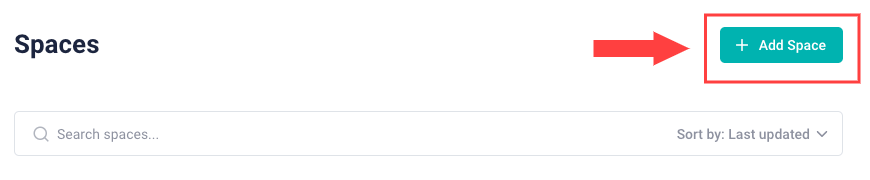
- Log in to Storyblok and create a new space by clicking Add Space:
- Select the New Space option, enter a name for the space, and select the server location (EU by default):

- You can review the structure and sample content details. By default, you'll find the following components:
- A Home page in the
Contentsection:
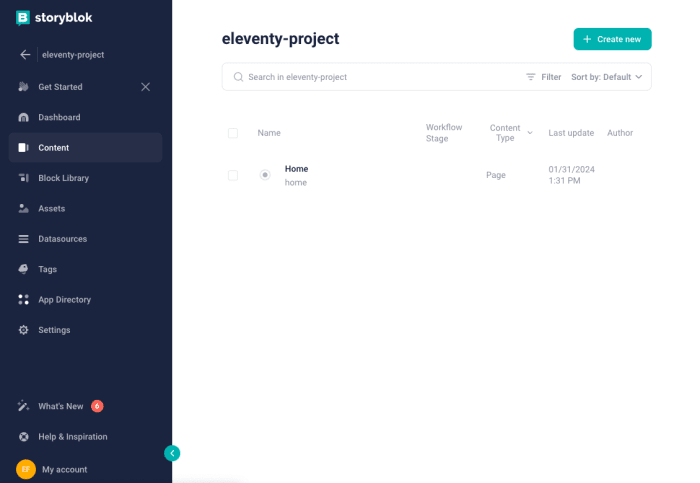
- When you access it, you will see the "Welcome to the Visual Editor" page by default, and the components of the page in the right sidebar:

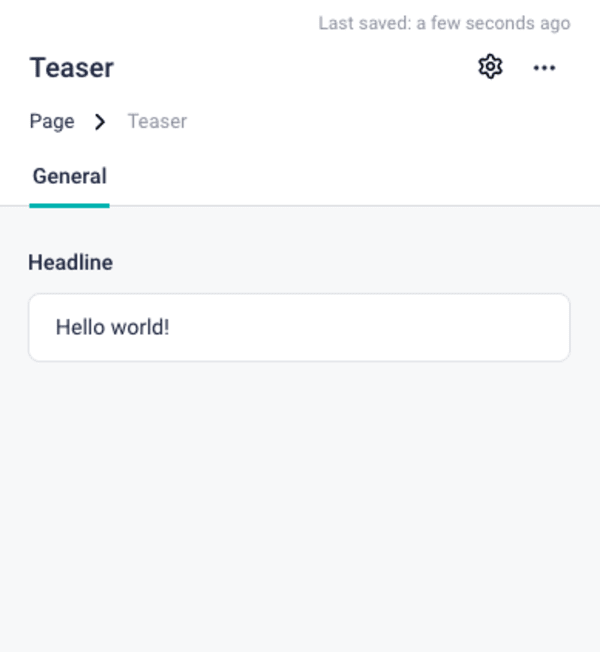
As you can see, the Home page has a body component with two block elements:
- Teaser: this is a text component. The current value of this field is "Hello world!".
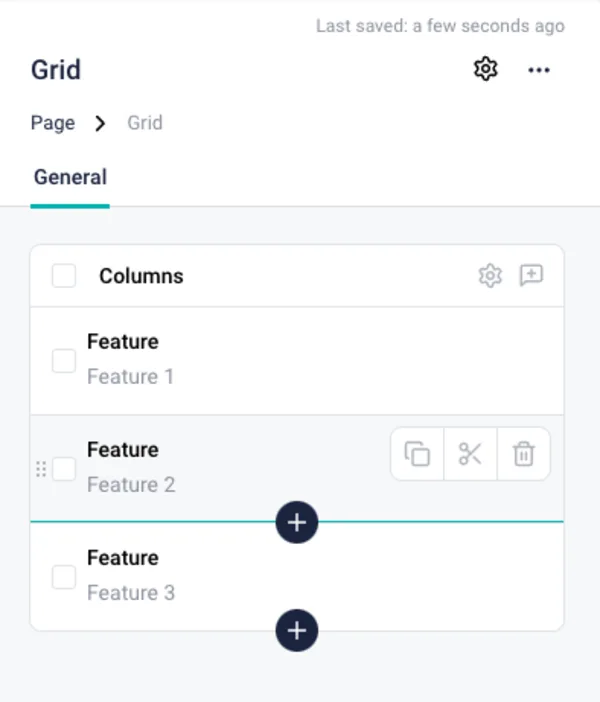
- Grid: this is a block component, with 3 text elements in it (with the text "Feature 1", "Feature 2", and "Feature 3" text on them).
We'll cover this later, but understanding the architecture of data is key to creating the right elements in your front-end development.
Creating a project in Eleventy #
Eleventy does not require you to use any JavaScript framework or library. And you can have a basic project up and running in literally less than 1 minute:
- Open a terminal
- Create a folder for your new project
mkdir myproject
- Access the project
cd myproject
- Create an
index.mdfile. The.mdextension is for markdown.
echo '# Page header' > index.md
- Run Eleventy. This command compiles the index.md file (but
.mdis only one of many valid file extensions) into the output folder(_siteby default), ready to be upload to your favorite hosting service.
npx @11ty/eleventy
You should get something like this:
[11ty] Writing _site/index.html from ./index.md (liquid)
[11ty] Wrote 1 file in 0.03 seconds (v2.0.1)
- However, you may want to run Eleventy from a local development server while working on it. Run Eleventy locally with this code:
npx @11ty/eleventy --serve
You will get something like this:
[11ty] Writing _site/index.html from ./index.md (liquid)
[11ty] Wrote 1 file in 0.04 seconds (v2.0.1)
[11ty] Watching…
[11ty] Server at http://localhost:8080/
- Open
http://localhost:8080in your browser and you will see your website.
Setting up and configuring the Eleventy project #
So far, so simple, right? Your project should have the following architecture:
├── _site
│   └── index.html
└── index.md
But let's add a few more things to prepare our project for our Storyblok integration.
We've created our first page, index.html, using one of the valid file extensions (.md). But this is just one of many options you can use for your templates:
- HTML: *.html
- Markdown: *.md
- WebC: *.webc
- JavaScript: *.11ty.js
- Liquid: *.liquid
- Nunjucks: *.njk
- Handlebars: *.hbs
- Mustache: *.mustache
- EJS: *.ejs
- Haml: *.haml
- Pug: *.pug
- Custom: *.*
I will use .md and .njk in this article, but feel free to use the template languages you feel more comfortable with.
There's plenty of options to use, combine and override the template language. You can find all the details in the documentation.
In addition to pages, you can use layouts to wrap other content. So let's open the project in VSCode and let's create a base layout to define the common HTML elements for all pages:
<!doctype html>
<html lang="en">
  <head>
    <meta charset="utf-8">
    <meta name="viewport" content="width=device-width, initial-scale=1.0">
    <title>{{ title }}</title>
  </head>
  <body>
    {{ content | safe }}
  </body>
</html>
Save this file as base.njk in a new _includes/layouts folder. Your project now has the following structure:
├── _includes
│   └── layouts
│       └── base.njk
├── _site
│   └── index.html
└── index.md
Now you can add the base.njk layout to your index.md page. To do this, add the following information to your existing file
+ ---
+ layout: layouts/base.njk
+ title: This is my homepage
+ ---

# Page header
What have been done here? The content between the two --- marks is the front matter. This is a YAML block at the top of the file and is a standard convention used by many Static Site Generators (SSG). So you're probably familiar with it if you've used other SSGs in the past. The content in the front matter is key-value pairs that provide information on how to generate data for this page.
In this case, two key-value pairs have been added:
- layout: This is the route of the desired layout to apply to the page.
- title: This is the title of the page. As mentioned earlier in the
base.njkfile, this information will be used in the<title>tag.
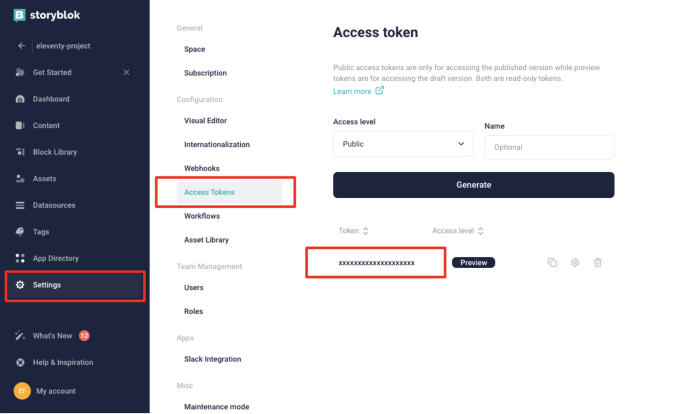
Get the API token from Storyblok #
An API token is necessary to follow the next steps. By default, you can see your preview token on the "Welcome to the Visual Editor" page. But you can find it (or create a new one) in Settings > Access Tokens as well.

How to query the Storyblok data from Eleventy #
Create the GraphQL query #
In this article, I will be using the GraphQL Content Delivery API. This is a read-only endpoint and is optimized for fast content delivery.
Use the following endpoint to send GraphQL requests:
https://gapi.storyblok.com/v1/api
Note that you need to append the region code if you are using different regions. For example:
https://gapi-us.storyblok.com/v1/api
If you haven't used GraphQL schemas before, I have good news for you! Storyblok has a playground where you can explore the functionalities and create the right query. You can access it using this URL with your Access Token in it:
https://gapi-browser.storyblok.com/?token=insert-here-your-access-token
In this case, we want to get the Home page data:
- Teaser (Hello world!)
- Grid
- Feature 1
- Feature 2
- Feature 3
So, this will be our query:
{
  PageItem(id: "insert-your-home-id") {
    name
    content {
      body
    }
  }
}
You can find your Home id running the following query in the playground:
{
  PageItems {
    items {
      id
      name
    }
  }
}
And it will return the id and the name:
{
  "data": {
    "PageItems": {
      "items": [
        {
          "id": xxxxxxxxxx,
          "name": "Home"
        }
      ]
    }
  }
}
Ok, now we know what data we want to get from Storyblok. But how to do it?
Data in Eleventy #
Eleventy can use data from several different sources. However, when merging data, there is a priority order for data sources. From highest to lowest priority:
- Computed data
- Front matter data in a template
- Template data files
- Directory data files
- Front matter data in layouts
- Configuration API global data
- Global data files
The two ways that work best for applying a headless CMS are Global Data files and Configuration API global data. In this article, I'm going to use the first one.
As you can imagine, this means some code is necessary to execute the API call. Let's create a folder called utils. Inside it, create a storyblok.js file with the following code:
module.exports = async function fetchAPI(query, { variables, preview } = {}) {
    const res = await fetch("https://gapi.storyblok.com/v1/api", {
      method: "POST",
      headers: {
        "Content-Type": "application/json",
        Token: "xxxxxxxxxxxxxxxxxxxxxxxx",
        Version: preview ? "draft" : "published",
      },
      body: JSON.stringify({
        query,
        variables,
      }),
    });

    const json = await res.json();
    if (json.errors) {
      console.error(json.errors);
      throw new Error("Failed to fetch API");
    }
    console.log(json.data)
    return json.data;
  }
Hardcoding your API token into your code is not a good practice. So you can store it as an .env variable.
# .env file
STORYBLOK_TOKEN: xxxxxxxxxxxxxxxxxxxxxxxx
However, you will need to install the dotenv package to access it.
npm install dotenv --save-devYou will see this step will generate some more files and folders. Don't worry, we'll manage this later. Now you can modify your storyblok.js file to use the .env variable:
+ require('dotenv').config()
module.exports = async function fetchAPI(query, { variables, preview } = {}) {
    const res = await fetch("https://gapi.storyblok.com/v1/api", {
      method: "POST",
      headers: {
        "Content-Type": "application/json",
-        Token: "xxxxxxxxxxxxxxxxxxxxxxxx",
+        Token: process.env.STORYBLOK_TOKEN,
        Version: preview ? "draft" : "published",
      },
      body: JSON.stringify({
        query,
        variables,
      }),
    });

    const json = await res.json();
    if (json.errors) {
      console.error(json.errors);
      throw new Error("Failed to fetch API");
    }
    console.log(json.data)
    return json.data;
  }
At this point, let's create a _data folder, and a homepage.js file in it with the following code:
const fetchAPI = require("../utils/storyblok");

module.exports = async function getHomepage () {
  const data = await fetchAPI(`
  {
    PageItem(id: "insert-your-home-id") {
      name
      content {
        body
      }
    }
  }
  `);
  return data?.PageItem;
}
The previous code will generate the homepage data from Storyblok's API, and it will be accessible from other pages and layouts.
So let's modify our index.md file to use it!
---
layout: layouts/base.njk
title: This is my homepage
---
- # Page header
+ # {{ homepage.content.body[0].headline }}
+ {{ homepage.content.body[1].columns[0].name }}
+ {{ homepage.content.body[1].columns[1].name }}
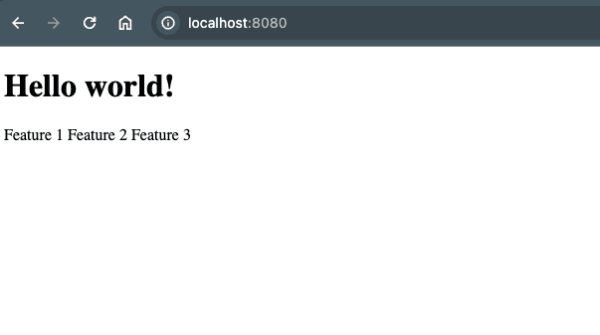
+ {{ homepage.content.body[1].columns[2].name }}After following all these steps, you should see something similar to this on your local server:
Using the Visual Editor from Storyblok #
As seen earlier, the Visual Editor uses a "Welcome to the Visual Editor" by default page. To see the page we've created using Storyblok's data we must set up the preview URL. Eleventy runs locally on http://localhost:8080. However, Storyblok requires an https connection to use the visual editor. There are several frameworks offering straightforward methods to use SSL in local development. Unfortunately, it's not that easy on Eleventy.
However, we can fis this issue with mkcert and local-ssl-proxy. Before following this process, ensure your local server is stopped. If it's still running, you can stop it by clicking Control + C.
- Install mkcert (globally)
npm install -g mkcert- Add mkcert to your local root CAs
mkcert -install- Generate a certificate for your localhost on your project, signed by mkcert. This will generate two
.pemfiles.
mkcert localhost- Install local-ssl-proxy (globally)
npm install -g local-ssl-proxy
- Run Eleventy locally (and keep this terminal running it!). By default, it will run over the port 8080:
npx @11ty/eleventy --serve- Open a new terminal and run the proxy SSL server through the port 3000 (and keep it running in this new terminal):
local-ssl-proxy --source 3000 --target 8080 --cert localhost.pem --key localhost-key.pem After these steps, open https://localhost:3000 on your browser and you should be able to see the same content as on http://localhost:8080.
With these two local servers running, you can go to Storyblok and change the preview URL. You can set it up directly from the default "Welcome to the Visual Editor" page, in the "Set up preview URL" field. Or you can change the preview URL from Settings > Configuration > Visual Editor:

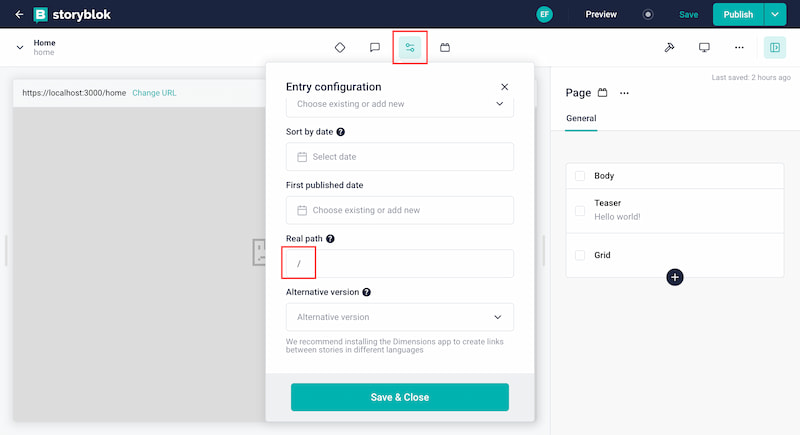
But you will probably be a bit disappointed after doing this because you'll get a 404 error after saving it. That's because Storyblok adds the content page path to the URL. So, by default, the visual editor will try to load https://localhost:3000/home. To change this, go to the page configuration and set / as the Real path:
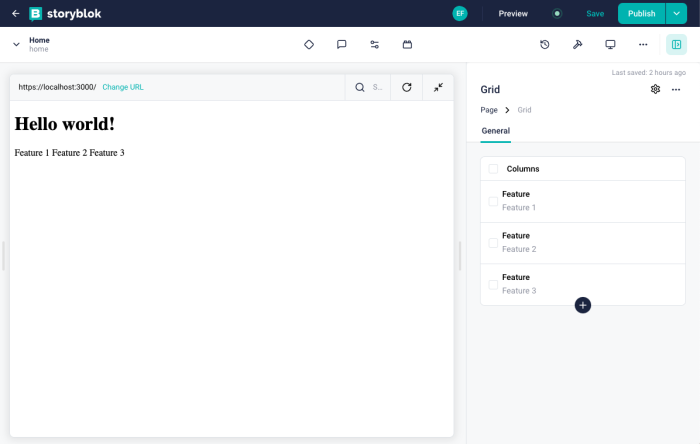
And now you have it! You can see the content using the Visual Editor.
Next steps #
After following all these steps, you now know how to create content on Storyblok and consume it from Eleventy using the GraphQL API. However, you will notice that content management is not dynamic. If you change something in Storyblok, it will not be updated on the local server or in the visual editor.
That's the expected behavior because Eleventy executes the GraphQL query at build time. If we serve the page locally, this means that the query won't be updated unless we change a file in our project. Therefore, any changes we make won't be visible on Storyblok until we rebuild the project on our local server.
That's a bit annoying, isn't it? But don't worry. I will show you how to overcome all these inconveniences in an upcoming article of this series of Eleventy and Storyblok articles.