Building Lightning-Fast Websites with Astro and Storyblok
This page is also available in: Español
Reading time: 12 minsIn today's digital landscape, web performance has become a critical factor in delivering great user experiences. Slow-loading sites can frustrate visitors and lead to higher bounce rates and lower conversions. However, achieving blazing-fast performance without compromising functionality can be a challenging task.
Astro and Storyblok is a power couple that empowers developers to build lightning-fast websites with a limited amount of JavaScript. By combining Astro's static site generation capabilities with Storyblok's headless CMS, developers can leverage the power of pre-rendered content and reduce client-side JavaScript execution, resulting in optimal site speed. This article delves into the seamless integration of Astro and Storyblok, highlighting the performance benefits and efficiency this approach delivers for modern web development.
Astro #
Astro is an open-source framework for building fast, content-focused websites with a modern developer experience.
Astro is:
- Content-focused: this framework was designed for content-rich websites.
- Server-first: rendering the HTML in the server results in faster websites.
- Fast by default: in theory, building slow websites in Astro should be impossible.
- Easy to use: Astro is for everybody. You don't need to be an expert to build something with Astro.
- Fully-Featured: you can choose from over +100 Astro integrations.
Moreover, these are some of Astro's key features:
- Bring Your Own Framework: You can use your favorite framework to build your project (React, Svelte, Vue...), or you can use just plain HTML and JavaScript.
- 100% static HTML: Astro renders your page to static HTML, removing all JavaScript from your final build by default.
- On-Demand Components: If you need some JavaScript, Astro can automatically hydrate interactive components when they become visible on the page.
- Fully-Featured: Astro supports TypeScript, Scoped CSS, CSS Modules, Sass, Tailwind, Markdown, MDX, and any of your favorite npm packages.
- SEO features: Automatic sitemaps, RSS feeds, paginations, and collections.
As you can see, Astro is an excellent option for building lightning-fast websites. However, creating and managing the content directly from Astro may not be the best experience for content editors.
Storyblok #
To overcome this limitation, you can use a headless CMS so your editors will have a visual tool to create and manage your website's content. And Storyblok is a great option to do that.
I'm planning to write a full article about Storyblok because it's worth going deeper into it and discovering all the capabilities and features you can leverage for your project.
But, for now, here you have some of Storyblok's key features and why I choose it as my favorite headless CMS:
- Headless: you can integrate Storyblok in any front-end project because it's a headless solution. Moreover, you can change your front-end and easily migrate your content from one technology to another.
- Cloud-native: you don't need to host it. Storyblok does that for you.
- Visual editor: you don't need to know markdown or any other markup languages to create and manage your content. Storyblok has a visual editor where you can visually manage and preview your content.
Show, don't tell #
The theory sounds great, but let's see a step-by-step practical example of creating a basic project using Astro and Storyblok.
1. Create a Storyblok project #
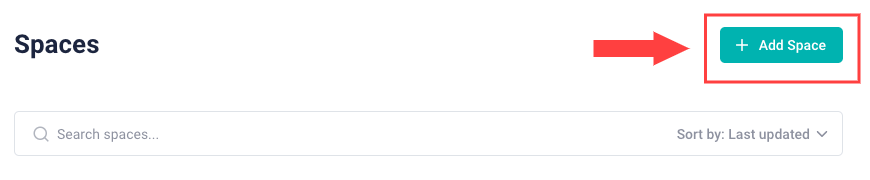
Log in to Storyblok and create a new space by clicking Add Space:
Choose the New Space option, define a name for the space and choose the server location (by default, EU):

Storyblok will create a space with sample content for you.
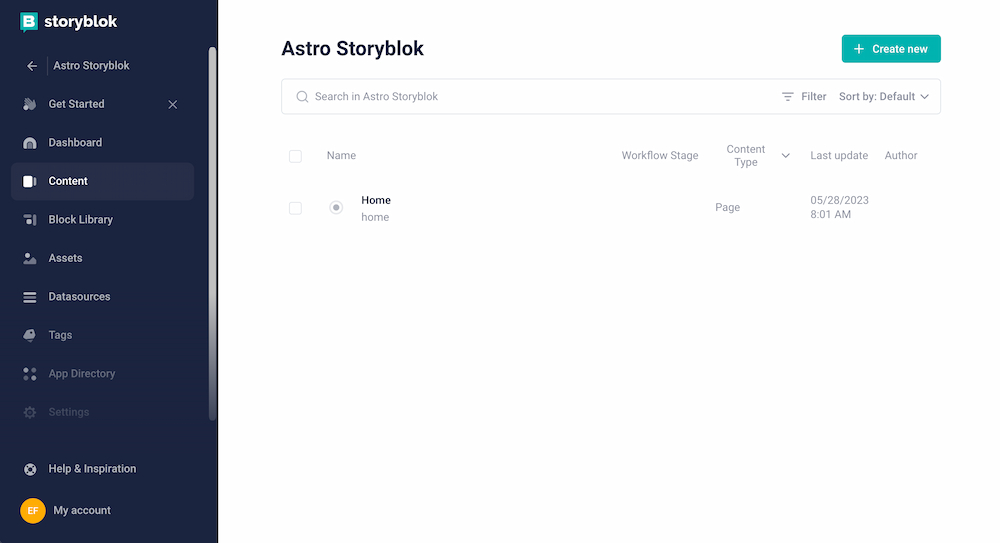
2. Create an Astro project #
From your Storyblok space, go to Get Started and copy the npx command:
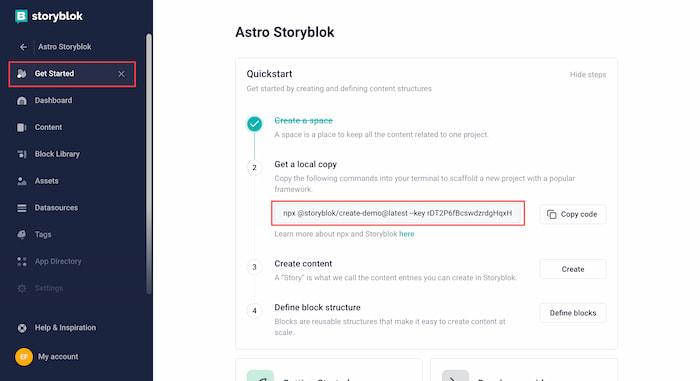
Now you can locally execute the copied command, and Storyblok's wizard will guide you through the process. To properly follow this tutorial, I need you to choose the following options:
- Select framework: Astro
- Select package manager: npm
- Space region: EU
- Local folder name for the project: up to you!
- Serve Storyblok locally: No
This will create the local Astro project. Now, access and install all the dependencies by running the following command:
cd ./your-project-folder && npm installOnce everything is installed, you will have your Astro + Storyblok project locally. But let's modify a couple of things.
Open your astro.config.mjs file. You will see your Access token is hardcoded there.
...
export default defineConfig({
  integrations: [
    storyblok({
      // accessToken: env.STORYBLOK_TOKEN,
      accessToken: 'xxxxxxxxxxxxxxxxxxxxxxxx',
      apiOptions: {
        region: '',
      },
...
But you can create a .env file in your root and set there your access token:
# .env file
STORYBLOK_TOKEN: xxxxxxxxxxxxxxxxxxxxxxxx
And modify your astro.config.mjs file accordingly:
...
export default defineConfig({
  integrations: [
    storyblok({
-     // accessToken: env.STORYBLOK_TOKEN,
-     accessToken: 'xxxxxxxxxxxxxxxxxxxxxxxx',
+     accessToken: env.STORYBLOK_TOKEN,
      apiOptions: {
        region: '',
      },
...
If your region is in the US instead of EU, you will need to update that field in the same file:
...
export default defineConfig({
  integrations: [
    storyblok({
      accessToken: env.STORYBLOK_TOKEN,
      apiOptions: {
-        region: '',
+        region: 'US',
      },
...
Optional step: Storyblok requires HTTPS to access the visual editor. By default, the Astro project comes with Vite's basicSsl plugin. However, I prefer to use mkcert. To install it, run the following command:
# install mkcert with npm
 npm install vite-plugin-mkcert -D
And update your astro.config.mjs file accordingly:
// astro.config.mjs file
  import { defineConfig } from 'astro/config';
  import storyblok from '@storyblok/astro';
  import { loadEnv } from 'vite';
- import basicSsl from '@vitejs/plugin-basic-ssl'
+ import mkcert from 'vite-plugin-mkcert';

 const env = loadEnv("", process.cwd(), 'STORYBLOK')

 export default defineConfig({
  integrations: [
    storyblok({
      accessToken: env.STORYBLOK_TOKEN,
    })
  ],
  vite: {
-   plugins: [basicSsl()],
+   plugins: [mkcert()],
    server: {
      https: true,
    },
  },
 })
3. Enable the Visual Editor #
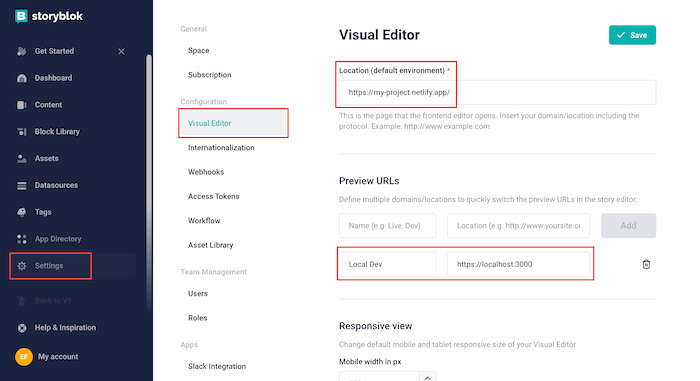
You're almost done! Now, you can return to Storyblok's visual editor and change the preview URL. Go to Settings > Configuration > Visual Editor and set your localhost URL using HTTPS:

Next step! Storyblok adds the path of the content page to the URL. So, by default, the visual editor will try to load https://localhost:3000/home. To change it, you need to go to the page configuration and set / as the Real path:
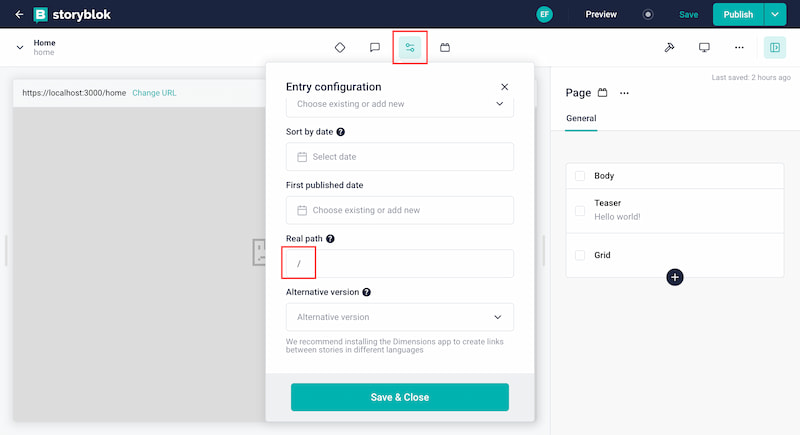
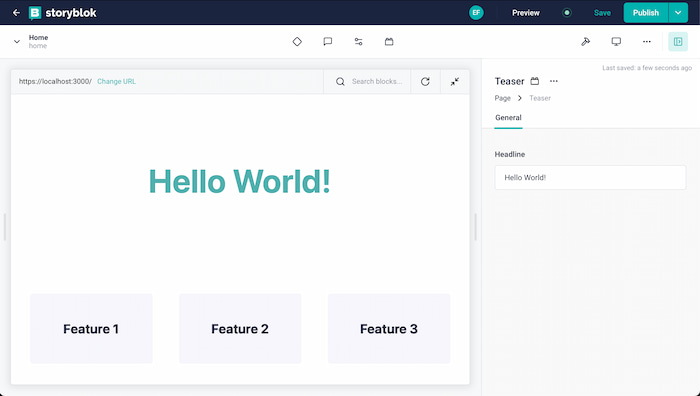
And now, if you refresh the visual editor, you will see your local version of your by-default Astro project's Home directly on Storyblok 🥳
4. Deploy the project on Netlify #
Having a visual editor is a great tool, especially for content editors. And this is something that other headless CMSs don't offer. However, using localhost as the preview URL doesn't sound like something that content editors will be happy to hear.
The good news is Storyblok allows you to configure multiple Preview URLs. Therefore, you can keep your localhost Preview URL for local development, and add other development/deployment environments as an option for the Preview source.
To simplify, let's deploy our Astro project on Netlify and configure it as a new Preview URL.
I assume you're familiar with GitHub and Netlify. If not, check this and this before continuing.
Once you've created a new site on Netlify, connected it to your Astro project on GitHub, and deployed it, you can add your new Netlify URL as a Preview URL. Go to Settings > Configuration > Visual Editor on your Storyblok space and set your Netlify URL. You can decide if you want it as your default environment or if you want it as an option:
And now, you finally have your visual editor enabled and available for both your developers and content editors... but with some limitations.
Astro is (by default) an SSG (static site generator) and generates all pages at build time. Hence, editing content in Storyblok won't give your content editors the instant update in Netlify they might expect.
To overcome this, you can use Astro in SSR mode in a specific environment for your content editors. You have more info about how to do this here.
Last but not least, once you publish any content/change in Storyblok, you will need to deploy the project to update your pages. Doing this manually is very annoying, but you can configure a webhook to manage it.
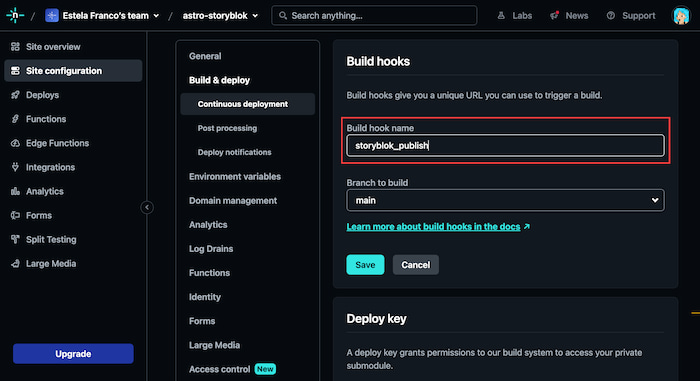
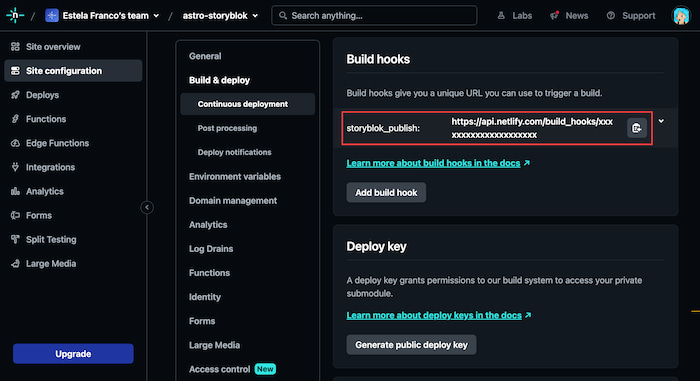
In Netlify, go to Deploys > Deploy settings > Build hooks > Add new hook. Define a name (for example, storyblok_publish), and save it. Copy the URL that this process generates.
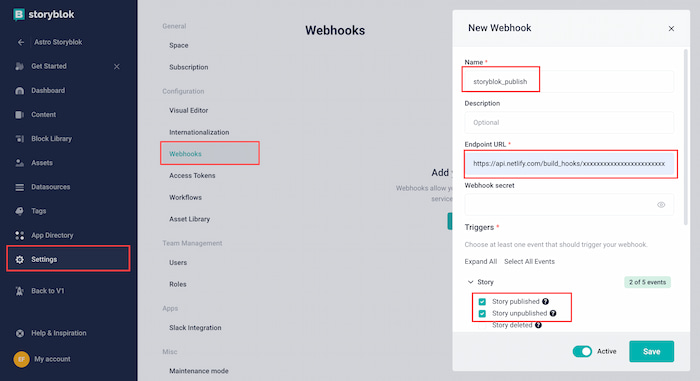
Now, go to your Storyblok space and create a new webhook in Settings > Webhooks > New Webhook. Paste the copied URL from Netlify in the Endpoint URL field and check the following triggers: Story > Story published and Story > Story unpublished.
Every time you publish or unpublish any story, a new deployment will be triggered in Netlify——hence, your website will be updated.
Is Astro + Storyblok really fast? #
I've explained a ton of things to create an Astro + Storyblok project because this combo is a great option to generate lightning-fast websites. And now that we have a boilerplate project, we can compare it to other options, right?
To properly evaluate the web performance results of this project, I also created a Nuxt.js and a Next.js project with the same boilerplate content — and I deployed all the projects on Netlify. So, I have 3 publicly accessible URLs that can be measured in the lab using PageSpeed Insights:
- Astro: https://astro-storyblok.netlify.app/
- Nuxt: https://nuxt-3-storyblok.netlify.app/
- Next: https://next-storyblok.netlify.app/
After running 5 separate tests for each project, this is the average data:
| DESKTOP | Astro | Next | Nuxt |
|---|---|---|---|
| FCP (s) | 0.413 | 0.438 | 1.071 |
| LCP (s) | 0.499 | 0.535 | 1.071 |
| SI (s) | 0.629 | 0.696 | 1.328 |
| TBT (ms) | 0 | 1.2 | 0 |
| CLS | 0 | 0 | 0.001 |
| MOBILE | Astro | Next | Nuxt |
|---|---|---|---|
| FCP (s) | 0.991 | 0.945 | 2.539 |
| LCP (s) | 0.991 | 1.197 | 2.539 |
| SI (s) | 1.243 | 1.377 | 2.972 |
| TBT(ms) | 0 | 92.4 | 0 |
| CLS | 0 | 0 | 0.001 |
As you can see, Astro has better results when compared to Nuxt or Next. And yes, I'm only testing a very basic template. However, it shows the baseline differences——and demonstrates Astro + Storyblok is a winning combo.
Moreover, Astro is lighter and loads less JS resources:
| DESKTOP | Astro | Next | Nuxt |
|---|---|---|---|
| Total resources | 4 | 10 | 11 |
| Size (Bytes) | 10977 | 91912 | 81407 |
| Total Scripts | 2 | 8 | 6 |
| Size (Bytes) | 7915 | 88276 | 62955 |
| MOBILE | Astro | Next | Nuxt |
|---|---|---|---|
| Total resources | 4 | 10 | 11 |
| Size (Bytes) | 10981 | 92003 | 81415 |
| Total Scripts | 2 | 8 | 6 |
| Size (Bytes) | 7915 | 88332 | 62935 |
So, have you tried it yet? :)